Flash Photography

What Is The Guide Number And How Do I Use It?

This post is written by Guest Contributor, Alex B. Wright. If you are also interested in writing a guest blog, please reach out using the form in the Contact page.

This is a very common question that is asked by those who want to get a better flash than the one they already have. Put simply the Guide Number is the output of the flash that can be used to find out the f-stop to be dialed into the camera when the flash distance is known. The trick is to divide the Guide Number (GN) by the distance (in feet) and the answer is the f-stop you set your camera into. In simple math, if your Guide Number for a particular flash is 56 and you are 10 feet away from your subject, the f-stop you are going to use is f/5.6. The shutter speed can only be as fast as the camera manual states;with my camera it is 1/180th of a second. You can shoot less but if you go faster it will cut of part of the image and this part will be black (because of the flash sync speed). The flash fires at an extremely high speed but the sync speed of the flash can be lower so that you can get some of the ambient light in your exposure. This works well when you are taking mood images. One thing to remember is, the higher the Guide Number the more power the flashgun has. To be sure, you can check the flash output if you have a flash meter. One thing you have to make sure is that the Guide Number and the distance to the subject both are measured in the same unit. If it is an European device, then it usually is in Metric system. And, in that case, you can measure your distance to subject in Metric system (centimeters or meters) as well and divide GN by distance and you will get your f-stop number.

Safe-Sync Hot Shoe To Hot Shoe

Safe-Sync Hot Shoe To Hot Shoe

Now one really important thing to remember is do NOT use a flash unit which trigger voltage is not known to you because if it is over 5 volts, it may fry the camera internal parts. If this is the flash that you used with your film camera then it is probably not a good choice. Most of the new digital cameras trigger voltage is 5 volts. If you want to go higher voltage, you will need an adapter that steps the voltage down to 5 volts. If you are in  doubt, have the flash voltage checked by a competent camera repair-person. Alternatively, you can get the product like Safe-Sync Hot Shoe To Hot Shoe (SSHSHS) made by Wein which is about $70.00 Canadian dollar. If you buy your stuff online, you can get it from Amazon for $49.95 USD right now. This device sits on top of the hot shoe and the flash fits on top of this device. This device works with AC powered strobe units. I have a set of Bowen’s studio units. There is a PC port on the Wein unit that the flash can plug into. This is a very handy thing to have in your camera bag. When you want to purchase a newer flash there are several third party manufacturers that make compatible units. You do not have to go with the manufacturer of the camera it is going to be used with. Most of the units have price going for them. You can get some of the flash unit as low as $150. Just check out the features you need and compare the price and then go to the camera store and make your choice.

Shooting Portrait In A Dark (Night) Or Low Light Condition

It is comparatively easier to take portrait shot in bright day light than in dark or low light condition. Taking portrait shot in dark or low light condition is challenging because you have to adjust two lights while taking picture; one is ambient light and the other one is flash light. In daylight shooting, you don't have to worry much about flash light (except fill light) and you don't have to deal much with shadows and colors of different lights. But while shooting in dark, you have to be extra careful with presence of very few or no ambient light, different artificial colors (street lights or other artificial lights in the environment), colors of those lights, shadows etc. Taking portraits at night is difficult but fun as well. As I mentioned earlier, you have to understand how ambient light and flash work together. Ambient light is whatever light present in the environment and flash light is artificial light produced by using light strobe or flash gun. The flash light has a very short duration and thus shutter speed has no role in the overall exposure it gives. You have to remember that aperture controls flash lights and shutter speed controls ambient light; this will make life little bit easier. But having said that, it doesn't mean that aperture can't be used to control ambient light. It's just simple and easy to implement if you remember those theories. Therefore, any shutter speed slower than the maximum shutter speed (also called Flash Sync Speed) can be used with flash. Please keep in mind that different camera model has different "max sync speed" value for shutter; usually 1/200th of sec or 1/250th of sec.

Night-portrait-at-Baltimore-Inner-Harbor.JPG

Focal Length : 55mm  Shutter Speed : 1/60th of sec  Aperture : f/4   ISO : 200

You can experiment with different aperture value to adjust flash lights and change shutter speed to change the brightness of the background. The longer the exposure, more ambient light passes through the lens and hence producing brighter background. Sometimes, while working in auto mode (TTL flash), you might not get result you want and it's better to control your camera and flash manually. You also have to be careful about the choice of the lens. Normally, longer lenses are preferred for portrait shot.

Few things to experiment

1. You can try wide open aperture to create nice and soft bokeh in the background which also helps throwing confusing background out of focus. You may have to adjust your light settings because wider aperture allow more light into the sensor.

2. Location is not that much important for portrait as your main subject covers almost entire frame (most of the time).

3. You can also try off-camera flash so that you can play with direction and quality of lights.

4. You can also use colored gel which gives different mood to the photographs depending on which color you are using.

5. If you get lots of shadows, you may want to try bounce flash instead of straight flash.

6. You can also use kicker flash (normally used behind the subject which helps to separate subject from the background).

Baltimore-Inner-Harbor-Night-portrait.JPG

Focal Length : 55mm  Shutter Speed : 1/5th of sec  Aperture : f/4   ISO : 1600

You can see the difference in Shutter speed and ISO value (among these two photographs) which changed the amount of light coming to the sensor and hence changing overall brightness of the picture. You also have to be careful about choosing ISO value; higher the ISO value, more digital noise (grainy dots) will be present in the image. If you want to learn more about the ISO and the digital noise, you may want to read my previous posts Understanding ISO in Digital Photography and Dealing with Digital Noise.

Five Different Ways Of Connecting External Flash To Nikon D7000

Nikon D7000 comes with a built-in flash which does pretty good job most of the time; specially when your subject is close, and you just need to fill the light. The power of the built-in flash is not enough to use it as a main source of light and this is when external flash comes handy. Nikon's every new DSLRs support external flash units but in addition, Nikon D7000 gives some extra options to connect external flash unit. Basically you have five different ways to connect an external flash unit to your Nikon D7000.

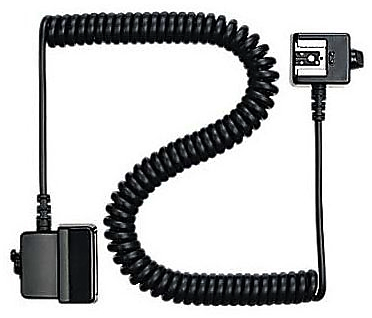
Nikon SC-29 TTL coiled remote cord

Nikon SC-29 TTL coiled remote cord

1. Mount on the accessory shoe: You can connect your flash unit to D7000 by sliding a compatible flash units into the accessory shoe, also called hot shoe. When you slide your flash unit to hot shoe, D7000 automatically detects Nikon speedlights and you can control it's function using camera menu options.

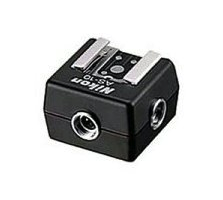
Nikon AS-10 TTL Multi-Flash adapter

Nikon AS-10 TTL Multi-Flash adapter

2. Connect to the accessory shoe with a cable: Instead of mounting your flash directly into accessory shoe, you can also use Nikon standard cables; Nikon SC-28 or SC-29 TTL coiled remote cords to connect flash units with Nikon DSLRs. These coiled remote cords have an accessory shoe on one end of nine-foot cable to accept flash, and a foot that slides into the camera accessory shoe on the other end, providing a link that is the same as mounting flash directly sliding into hot shoe. But using these cables gives you flexibility of placing flash units into different orientations than being fixed on top of the camera. It is useful when you want to experiment with direction of lights using wired connection between flash units and camera.

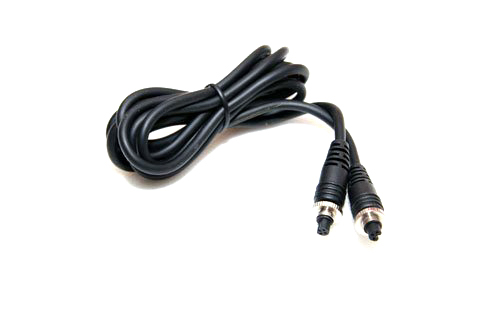
Nikon SC-26:27 TTL Multi-Flash Sync cord

Nikon SC-26:27 TTL Multi-Flash Sync cord

3. Connect using Multi-Flash cables: You can also use Nikon SC-27 or SC-26 TTL Multi-Flash Sync Cords to connect TTL flash units to each other or through the AS-10 TTL Multi-Flash adapter or SC-28 TTL remote cord for multi-flash operation. You may want to use this with older NIkon Flash units as it doesn't support i-TTL or D-TTL operation.

Nikon AS-15 Sync Terminal Adapter

Nikon AS-15 Sync Terminal Adapter

4. Connect to a PC/X connector: Nikon D7000 doesn't have built-in PC sync connector, but Nikon offers an optional adapter, Nikon AS-15 Sync Terminal Adapter, that clips into hot shoe and provides a PC/X connector which can be used with studio strobes. These adapters are useful when they are combined with a voltage limiter so that you don't need to worry about frying your camera with an older flash units that has a triggering voltage that's too high.

Note: According to B&H online store, AS-15 Sync Terminal Adapter doesn't provide high-voltage sync protection, and is not recommended for flash units that have more than 6v.

5. Connect using Wireless technology: Nikon D7000 has a commander mode option which lets you trigger most of the Nikon speedlight units wirelessly. Using commander mode, these speedlights can be triggered by another master flash in commander mode or by the RU-800 infrared device. You can also use third party wireless device such as RadioPopper JrX or PocketWizards wireless flash triggers which are pretty much dominant in the market.