Portrait

What Does Dragging The Shutter Mean And When Should We Use It?

This post is a part of our Q&A section. If you want to submit your question, please use the form in the Contact page.

QA.jpg

Ed (Colorado, USA) asked : I have heard the term "dragging the shutter" quite a few times from professional photographer. Do you mind explaining it with an example may be?

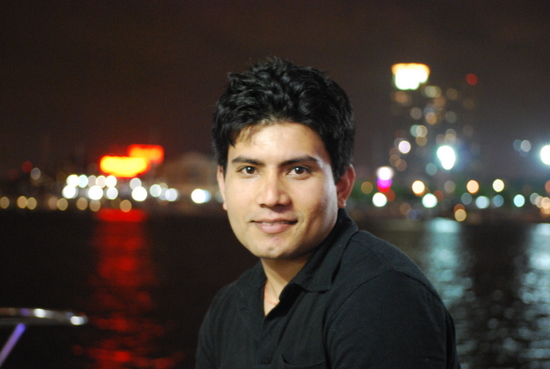
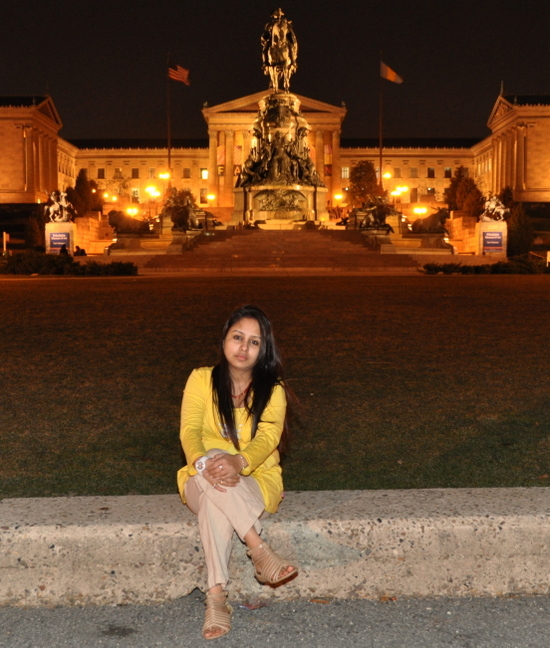
When you are shooting at night, you have to deal with different types of lights; flash light (if you are shooting a portrait), street lights and environmental lights. Sometimes you want to shoot without the background objects but there are times when you want to capture the beautiful background scene or nicely lit architecture along with your subject (portrait for example). If you have noticed latest point and shoot cameras or even some entry level DSLR cameras, there is a mode called "Night Portrait" mode which is basically an auto mode. If you turn your mode dial into Night Portrait mode, camera automatically manages the camera settings to capture the portrait along with the background lights. While using one of these auto modes, sometimes you get the good result but sometimes you may need more control over the exposure parameters or the flash mode to get more balanced result. If you want to control the lights and camera settings, you have to step up and dial into one of the semi-manual (S, A and P) or full manual (M) mode and set the parameters accordingly.

You might have used this technique before knowingly or unknowingly and you are just not familiar with the terminology which happens to all of us at some point. It is all about balancing flash and ambient light (light that exist in the environment). When balancing ambient light with flash light, photographers choose camera settings to retain the mood of place, time and environment of shooting. While doing so, we have to allow ambient light by allowing shutter to open little longer (dragging the shutter) and apply the flash light at the end of the exposure (usually to freeze the motion).

Dragging the shutter is very simple and also commonly used technique while doing night portrait photography. It is important to know whether you are using a Manual flash or a TTL flash setting with your camera. If you are using a Manual flash, usually Aperture, ISO, subject distance with the flash and the power of the flash affect flash exposure. Whereas ISO, Aperture and Shutter speed usually contribute to the ambient light exposure. That means you can use the Shutter speed independently to control ambient light exposure only because changing Aperture and ISO will also affect Manual flash exposure. The environmental light (also called ambient light) is continuous source of light but flash light is gone with the blink of an eye which is the main reason why we say Shutter speed doesn't contribute to the flash exposure.

But if you are using TTL flash, those four controls (Aperture, ISO, Distance and the Power) have no control over the flash exposure because your camera and the flash talk to each other based on the Aperture, ISO, distance to the subject and apply appropriate flash power to give the correct exposure. That means you can now use Aperture or ISO or Shutter speed to control ambient light without affecting flash exposure. Using TTL flash is relatively easy and you don't have to remember much while changing camera settings but if you are using Manual flash, you have to be very careful about what setting you have changed because if you change your Aperture, you have to change flash power or ISO or distance to compensate flash exposure but at the same time changing Aperture also affects ambient and hence you may have to adjust Shutter speed too. It's kind of confusing but enough practice clears confusion.

Night portrait

Night portrait

Shutter Speed : 1/60     Aperture : f/4     ISO : 220

Usually dragging the shutter slower than 1/60th of second allows you to register ambient light but you can change shutter speed as you need more and more ambient light. I usually use rear sync flash with slower shutter speed so that your final moment would be frozen.

Dragging the Shutter

Dragging the Shutter

Shutter Speed : 1/5     Aperture : f/4.2     ISO : 1600

Dragging the Shutter

Dragging the Shutter

Shutter Speed : 1/3     Aperture : f/4     ISO : 800

Baltimore-Inner-Harbor-Night-portrait.jpg

Shutter Speed : 1/5     Aperture : f/4     ISO : 1600

These images are taken with TTL flash and you can see how changing camera settings is adopted automatically by flash unit and applying appropriate power to properly expose the image.

Shooting Portrait In A Dark (Night) Or Low Light Condition

It is comparatively easier to take portrait shot in bright day light than in dark or low light condition. Taking portrait shot in dark or low light condition is challenging because you have to adjust two lights while taking picture; one is ambient light and the other one is flash light. In daylight shooting, you don't have to worry much about flash light (except fill light) and you don't have to deal much with shadows and colors of different lights. But while shooting in dark, you have to be extra careful with presence of very few or no ambient light, different artificial colors (street lights or other artificial lights in the environment), colors of those lights, shadows etc. Taking portraits at night is difficult but fun as well. As I mentioned earlier, you have to understand how ambient light and flash work together. Ambient light is whatever light present in the environment and flash light is artificial light produced by using light strobe or flash gun. The flash light has a very short duration and thus shutter speed has no role in the overall exposure it gives. You have to remember that aperture controls flash lights and shutter speed controls ambient light; this will make life little bit easier. But having said that, it doesn't mean that aperture can't be used to control ambient light. It's just simple and easy to implement if you remember those theories. Therefore, any shutter speed slower than the maximum shutter speed (also called Flash Sync Speed) can be used with flash. Please keep in mind that different camera model has different "max sync speed" value for shutter; usually 1/200th of sec or 1/250th of sec.

Night-portrait-at-Baltimore-Inner-Harbor.JPG

Focal Length : 55mm  Shutter Speed : 1/60th of sec  Aperture : f/4   ISO : 200

You can experiment with different aperture value to adjust flash lights and change shutter speed to change the brightness of the background. The longer the exposure, more ambient light passes through the lens and hence producing brighter background. Sometimes, while working in auto mode (TTL flash), you might not get result you want and it's better to control your camera and flash manually. You also have to be careful about the choice of the lens. Normally, longer lenses are preferred for portrait shot.

Few things to experiment

1. You can try wide open aperture to create nice and soft bokeh in the background which also helps throwing confusing background out of focus. You may have to adjust your light settings because wider aperture allow more light into the sensor.

2. Location is not that much important for portrait as your main subject covers almost entire frame (most of the time).

3. You can also try off-camera flash so that you can play with direction and quality of lights.

4. You can also use colored gel which gives different mood to the photographs depending on which color you are using.

5. If you get lots of shadows, you may want to try bounce flash instead of straight flash.

6. You can also use kicker flash (normally used behind the subject which helps to separate subject from the background).

Baltimore-Inner-Harbor-Night-portrait.JPG

Focal Length : 55mm  Shutter Speed : 1/5th of sec  Aperture : f/4   ISO : 1600

You can see the difference in Shutter speed and ISO value (among these two photographs) which changed the amount of light coming to the sensor and hence changing overall brightness of the picture. You also have to be careful about choosing ISO value; higher the ISO value, more digital noise (grainy dots) will be present in the image. If you want to learn more about the ISO and the digital noise, you may want to read my previous posts Understanding ISO in Digital Photography and Dealing with Digital Noise.

Getting The Perfect Shot Of Your Baby

This post is written by Guest Contributor, Champ Ocampo. If you are also interested in writing a guest blog, please reach out using the form in the Contact page.

Taking pictures of baby is not a joke. We need lots of patience to get the right angle and more patience to get the shot of baby smiling with joy. It will be an expensive deal if we will have our baby photo shoot in a studio. Save time and money; get your DSLR and try shooting your baby on your own and I am here to share some of tips with you. I took this picture of a four months old baby girl couple of months ago. You may have noticed that I captured her smiling. But to be honest with you, she was not really smiling at me but in fact she was smiling at her Mom who was standing behind me. Yes, I did not do this alone. I asked her parents to stay behind me and catch the baby’s attention.

Baby-Photography.jpg

Photographing a baby is a team effort. You can ask your spouse to get behind you and try to catch your baby’s attention by clapping hands while calling the baby’s name or shake a rattling toy that will make a baby pay attention and eventually smile and laugh. The technique here is just to keep on shooting in order to get the perfect angle and perfect smile of the baby.

Let me walk you through the equipment setup and camera settings I used. I used 50mm f/1.4 prime lens but you can use any lens you want or have. I also used an external flash mounted on a stand with an umbrella. Do not use a flash with babies who are 3 months old or younger. It might have a side effect on baby’s sight development and I recommend using pure ambient lights in that case.

Our camera settings

1. Focal length – 50mm

2. Aperture – f/1.8

3. Shutter Speed – 1/200

4. ISO 100

5. WB – Kelvin 5000 (or Set into Flash icon)

Equipments we used

1. Flash stand with hot shoe holder

2. Umbrella and holder

3. Flash trigger and receiver

Flash positioning

1. 45 degrees from your right

2. 3 feet away from the subject

3. Stand should be at least 3-4 feet tall from the subject

Set the flash power level a little bit lower than normal and do not forget to attach receiver on the flash unit and trigger on your camera body to fire the flash remotely. I prefer bounce light in this case; so invert the umbrella to bounce off the flash to produce more diffused light.

Now the equipment is all set and it’s time for shooting. Always remember that proper timing is required while photographing a baby. Ask your spouse to catch your baby’s attention. Keep your eyes focused on the baby’s face, once you see your baby smiling, shoot it and capture the moment of your life. Enjoy!