What Does Dragging The Shutter Mean And When Should We Use It?

This post is a part of our Q&A section. If you want to submit your question, please use the form in the Contact page.

QA.jpg

Ed (Colorado, USA) asked : I have heard the term "dragging the shutter" quite a few times from professional photographer. Do you mind explaining it with an example may be?

When you are shooting at night, you have to deal with different types of lights; flash light (if you are shooting a portrait), street lights and environmental lights. Sometimes you want to shoot without the background objects but there are times when you want to capture the beautiful background scene or nicely lit architecture along with your subject (portrait for example). If you have noticed latest point and shoot cameras or even some entry level DSLR cameras, there is a mode called "Night Portrait" mode which is basically an auto mode. If you turn your mode dial into Night Portrait mode, camera automatically manages the camera settings to capture the portrait along with the background lights. While using one of these auto modes, sometimes you get the good result but sometimes you may need more control over the exposure parameters or the flash mode to get more balanced result. If you want to control the lights and camera settings, you have to step up and dial into one of the semi-manual (S, A and P) or full manual (M) mode and set the parameters accordingly.

You might have used this technique before knowingly or unknowingly and you are just not familiar with the terminology which happens to all of us at some point. It is all about balancing flash and ambient light (light that exist in the environment). When balancing ambient light with flash light, photographers choose camera settings to retain the mood of place, time and environment of shooting. While doing so, we have to allow ambient light by allowing shutter to open little longer (dragging the shutter) and apply the flash light at the end of the exposure (usually to freeze the motion).

Dragging the shutter is very simple and also commonly used technique while doing night portrait photography. It is important to know whether you are using a Manual flash or a TTL flash setting with your camera. If you are using a Manual flash, usually Aperture, ISO, subject distance with the flash and the power of the flash affect flash exposure. Whereas ISO, Aperture and Shutter speed usually contribute to the ambient light exposure. That means you can use the Shutter speed independently to control ambient light exposure only because changing Aperture and ISO will also affect Manual flash exposure. The environmental light (also called ambient light) is continuous source of light but flash light is gone with the blink of an eye which is the main reason why we say Shutter speed doesn't contribute to the flash exposure.

But if you are using TTL flash, those four controls (Aperture, ISO, Distance and the Power) have no control over the flash exposure because your camera and the flash talk to each other based on the Aperture, ISO, distance to the subject and apply appropriate flash power to give the correct exposure. That means you can now use Aperture or ISO or Shutter speed to control ambient light without affecting flash exposure. Using TTL flash is relatively easy and you don't have to remember much while changing camera settings but if you are using Manual flash, you have to be very careful about what setting you have changed because if you change your Aperture, you have to change flash power or ISO or distance to compensate flash exposure but at the same time changing Aperture also affects ambient and hence you may have to adjust Shutter speed too. It's kind of confusing but enough practice clears confusion.

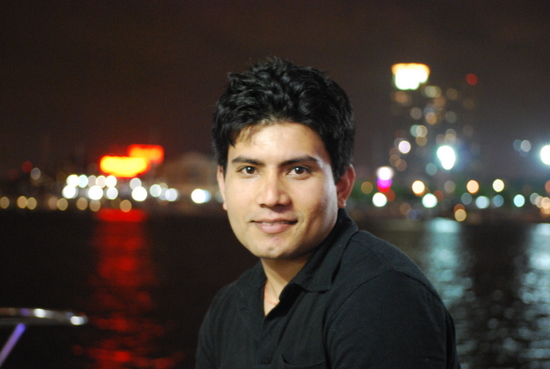
Night portrait

Night portrait

Shutter Speed : 1/60     Aperture : f/4     ISO : 220

Usually dragging the shutter slower than 1/60th of second allows you to register ambient light but you can change shutter speed as you need more and more ambient light. I usually use rear sync flash with slower shutter speed so that your final moment would be frozen.

Dragging the Shutter

Dragging the Shutter

Shutter Speed : 1/5     Aperture : f/4.2     ISO : 1600

Dragging the Shutter

Dragging the Shutter

Shutter Speed : 1/3     Aperture : f/4     ISO : 800

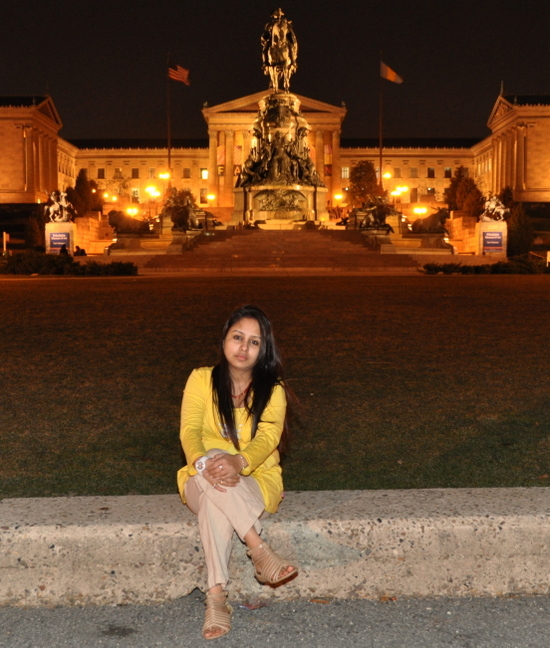
Baltimore-Inner-Harbor-Night-portrait.jpg

Shutter Speed : 1/5     Aperture : f/4     ISO : 1600

These images are taken with TTL flash and you can see how changing camera settings is adopted automatically by flash unit and applying appropriate power to properly expose the image.

What Is The Guide Number And How Do I Use It?

This post is written by Guest Contributor, Alex B. Wright. If you are also interested in writing a guest blog, please reach out using the form in the Contact page.

This is a very common question that is asked by those who want to get a better flash than the one they already have. Put simply the Guide Number is the output of the flash that can be used to find out the f-stop to be dialed into the camera when the flash distance is known. The trick is to divide the Guide Number (GN) by the distance (in feet) and the answer is the f-stop you set your camera into. In simple math, if your Guide Number for a particular flash is 56 and you are 10 feet away from your subject, the f-stop you are going to use is f/5.6. The shutter speed can only be as fast as the camera manual states;with my camera it is 1/180th of a second. You can shoot less but if you go faster it will cut of part of the image and this part will be black (because of the flash sync speed). The flash fires at an extremely high speed but the sync speed of the flash can be lower so that you can get some of the ambient light in your exposure. This works well when you are taking mood images. One thing to remember is, the higher the Guide Number the more power the flashgun has. To be sure, you can check the flash output if you have a flash meter. One thing you have to make sure is that the Guide Number and the distance to the subject both are measured in the same unit. If it is an European device, then it usually is in Metric system. And, in that case, you can measure your distance to subject in Metric system (centimeters or meters) as well and divide GN by distance and you will get your f-stop number.

Safe-Sync Hot Shoe To Hot Shoe

Safe-Sync Hot Shoe To Hot Shoe

Now one really important thing to remember is do NOT use a flash unit which trigger voltage is not known to you because if it is over 5 volts, it may fry the camera internal parts. If this is the flash that you used with your film camera then it is probably not a good choice. Most of the new digital cameras trigger voltage is 5 volts. If you want to go higher voltage, you will need an adapter that steps the voltage down to 5 volts. If you are in  doubt, have the flash voltage checked by a competent camera repair-person. Alternatively, you can get the product like Safe-Sync Hot Shoe To Hot Shoe (SSHSHS) made by Wein which is about $70.00 Canadian dollar. If you buy your stuff online, you can get it from Amazon for $49.95 USD right now. This device sits on top of the hot shoe and the flash fits on top of this device. This device works with AC powered strobe units. I have a set of Bowen’s studio units. There is a PC port on the Wein unit that the flash can plug into. This is a very handy thing to have in your camera bag. When you want to purchase a newer flash there are several third party manufacturers that make compatible units. You do not have to go with the manufacturer of the camera it is going to be used with. Most of the units have price going for them. You can get some of the flash unit as low as $150. Just check out the features you need and compare the price and then go to the camera store and make your choice.

Turn That Dial And Experience Your Camera

This post is written by Guest Contributor, Terry Houton. If you are also interested in writing a guest blog, please reach out using the form in the Contact page.

A few years ago, when I first made the move from my little Kodak to the Nikon D40, it was a little intimidating. I had no formal background in photography whatsoever and absolutely no clue about the ISO, Aperture, Rule of Thirds or any of that technical mumbo jumbo. Fortunately, I had a couple of things going for me that would be a big help in that area. First, I had a background in IT that was somewhat similar in that when I started on that career path I had absolutely no idea what I was doing. As I have frequently done in my life, I threw myself into it with the mindset that I was either going to sink or swim. It's paid my bills for nearly 15 years now so I think I've done OK. Secondly, I had a good friend who I was able to lean on and ask plenty of questions when I needed to do so. Like most people that venture into the DSLR world, the first thing I did was turned the dial to Auto. As you would imagine, that allows you to just turn on your camera and shoot away. The problem with that setting is that it makes all of the decisions for you with speed, light settings, etc. and you won't always get the best shot possible. There are times where the exposure will not be correct because the processor is picking up something like light in the background, dark clothes, etc. and will make your pictures come out under or over exposed.

My suggestion to those who are really serious about learning the art of photography is to do what I did and put your nose into books, get on the internet or seek out any endless number of other resources for information regarding ISO, shutter speed, aperture and all of the otherwise techie stuff that will help you shoot better pictures. The last piece of advice that I would give you is to read your camera manual and learn how it works inside and out. It might not be the most thrilling read of your lifetime but it's well worthwhile.