AE-L/AF-L

How To Use AE-L/AF-L Button Correctly?

This post is a part of our Q&A section. If you want to submit your question, please use the form in the Contact page.

QA.jpg

Darren (London, UK) asked : What is the function of AE-L/AF-L button which is on the right side of the viewfinder on my Nikon D60. I read the camera manual but couldn’t grasp the concept of it. Can you write about its feature or may be how to use it and when to use it?

I wrote a blog on how to set AE-L/AF-L button on Nikon D90 and how does it work a while ago. Nikon’s all DSLRs including D60 share same theory about how it works but it depends on the situation when do you want to use it. Basically AE-L/AF-L stands for Auto Exposure Lock/Auto Focus Lock but you can use AE-L/AF-L button for many other different functions. You can even use this button to lock Flash value which we discussed in a earlier blog. Camera menu option and the button position on the camera may vary depending on the camera model, but you will find it under the CSM menu and probably you have to go under the Control option. If you want to see the details on how to set AE-L/AF-L button in your camera, you may want to check the blog post on How to set AE-L/AF-L button on Nikon D90. In this article, I am going to demonstrate the effect of Auto Exposure Lock feature with the help of couple photographs I took. Once you grasp the concept of it, you can apply the technique in similar situations.

Before applying Auto Exposure Lock (AE-L)

Before applying Auto Exposure Lock (AE-L)

My camera was in Aperture Priority mode and the metering system was in Matrix metering mode. That means camera metered the exposure based on the overall scene inside the frame. The white snow background gave the sense of a bright situation to the camera metering system and it calculated the Shutter speed accordingly. But when I took the picture, the main subject came out underexposed because the camera metering system couldn’t figured it out that the main subject was not as bright as majority of the frame.

After applying Auto Exposure Lock (AE-L)

After applying Auto Exposure Lock (AE-L)

To overcome this issue, I thought Auto Exposure Lock (AE-L) feature would be the best choice in this situation. Before activating the feature, I zoomed in little bit so that the brighter area in the frame will get reduced and the camera metering system won’t be fooled. After that I focused on the main subject and press the AE-L/AF-L button to lock the exposure at the current values. At this point, the camera metering system calculated the exposure values based on the relatively darker area because I eliminated the most of the snow by zooming into the subject. I then zoomed out (recomposed the shot) and took a picture with the locked exposure. This gave me a nicely lit subject and well exposed background. If you are not careful enough with the framing, you might end up getting some overexposed areas in the frame as well.

[Updated on 4/30/2019] Someone might argue that why don't we use spot metering instead of matrix metering and lock the focus on the subject’s face and meter the exposure. By doing so, camera is going to meter the light based on the spot where the focus is locked on and not the entire frame, which will then properly exposed the subject. Yes, it might work in some cases but not a good choice in every situation, and that is the exact reason I chose this picture to demonstrate the effect. If I use spot metering in this particular scenario, it will properly expose the subject but will also overexpose the snow area way too much than I would like it be.

Nikon's Flash Value Lock (FV Lock) Feature

Nikon’s latest DSLR cameras come with the feature to lock exposure settings and other parameters like Autofocus, Focus point area, flash value etc. When the exposure is set for the shot, or when the camera acquires auto focus on the subject, or when we want to lock the flash value, we can use the lock feature to lock those settings so that it won’t change inadvertently during the shooting. We discussed about Auto Exposure Lock (AE-L) previously, and today, we are going to discuss about the Flash Value lock (FV Lock) feature.

The basic idea is common between these two features. Auto Exposure Lock feature is use to lock the exposure value and the Flash Value Lock is use to lock the flash power. This feature comes very handy when we are shooting in camera’s default metering mode, matrix metering mode, in which the camera calculates the exposure and the flash setting by taking the information from the entire frame rather than the subject itself. Let’s say we put the subject in the middle of the frame, lock the focus on the subject and press the shutter release button halfway down to calculate the exposure. Now, if we continue pressing the shutter release button all the way down and take a picture, there would be no issue and the camera would balance the overall exposure of the subject and the background image. But, let’s say, we don’t want to put the subject in the middle of the frame and want to recompose the shot. As soon as we move the camera to recompose, metering system will calculate the new exposure value and the flash setting based on the new information from the frame. If the new composition has more darker area, camera will increase the flash power to compensate for the less available light and it would result into the overexposed subject when we press the shutter release button to take the picture. Now, let’s see how can we solve the problem by locking the flash value.

How can we lock the Flash Value?

To solve this problem, we can program the camera’s function button or even AE-L/AF-L button to activate the Flash Value Lock (FV Lock) feature once the button is pressed. When we program either of these two buttons for the FV Lock, next thing we would have to do is point the camera/flash towards the subject, press the shutter release button half way down which locks the focus on the subject and meters the exposure. We would then lock the flash value by pressing the FV Lock button, which we just programmed. After pressing the FV lock button, camera will fire pre-flashes on the subject briefly and lock the flash power to properly expose the subject in given lighting situation. We would then recompose the shot by moving the subject inside the frame. After the flash value is locked, even if the lighting condition is changed in the frame by recomposing the shot, flash value will not be recalculated by the camera and stays in the previously locked value. When we are ready to take the shot, we will press the shutter release button and the flash will be fired with the power camera previously locked into. This will give the proper exposure to the subject ignoring the ambient light in the background.

Once we lock the flash value, it remains on that power setting unless we press the FV Lock button again, or the camera is turned off, or the light meter in the camera times out. We can increase the light meter timeout period but we have to be careful doing so, because it might drain the camera battery faster if we forget to bring it back to it’s default value after we are done shooting with the locked flash value.

Flash Value Lock.JPG

In this photograph above, there is a mix of color tones and the lights in the background and the foreground. There is a dark table in the background and a white tablecloth in the foreground. She is wearing a dark color dress and he is wearing a white t-shirt. The lighting situation is bit tricky and I wanted to properly expose for the subjects and place them on the side of the frame rather than in the center of the frame (Rule of Thirds). This kind of a situation can confuse the camera light meter and flash may fire with the improper power setting. That is why I locked the flash value on the subject, recomposed the frame and then took the shot.

Normally we should use the FV lock feature to meter the subject that is off-centered and the background is bit darker.

Using ISO Settings With Nikon D90

We have already discussed about ISO and its pros and cons in my previous blog. Now, lets discuss about the ISO settings for Nikon D90. There is no doubt that Nikon D90 is a very powerful and semi-pro DSLR camera and also one of the first DSLR which records HQ video with sounds. Today, I am not going to discuss about the movie feature and save that topic for the future discussion. D90 is also considered as one of the best camera to capture variety of rich colors in if you handle the exposure correctly. We know that Shutter Speed, Aperture and ISO are the three main fundamentals (also called an exposure triangle) to control your exposure settings. We also discussed about the exposure compensation using different techniques like exposure lock, bracketing etc and we will discuss more about the proper combination of shutter speed and aperture for proper exposure in our future posts. But for now, lets discuss about the ISO settings that affects the exposure.

ISO Sensitivity settings.png

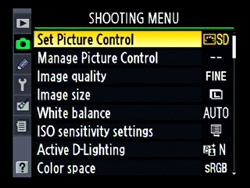
When you press the Menu button at the left panel on the back of your camera, you will get few menu options. Please click on the Shooting Menu (camera icon) where you will find ISO sensitivity settings option. When you go inside that option, there are mainly two things to be considered, one is ISO Sensitivity which is available with all exposure modes and another one is ISO Sensitivity Auto Control which is available in PAS modes only.

ISO Sensitivity option allows you to specify the ISO settings. It's a same thing as you press the ISO button on the back of your D90 and rotate main command dial. In Nikon D90, ISO can be set to AUTO which lets camera pick ISO value automatically as necessary or you can also manually set any value that ranges from LO 1 (equivalent to ISO 100) through 3200 to HI 1 (equivalent to ISO 6400). ISO Sensitivity Auto Control menu lets you specify how and when your camera will adjust the ISO value automatically under different lighting conditions. When Auto ISO is activated, the camera set ISO value whenever it's necessary if current ISO settings won't allow you for optimal exposure. There are three main features to be considered when you enable ISO sensitivity auto control option. Here is the brief discussion about them.

1.  ISO sensitivity auto Control ON/OFF

This button will let you set the ISO sensitivity auto control ON or OFF. If it's OFF, it will prevent the camera from changing the ISO value automatically. If you turn this feature off, you have to increase or decrease the ISO value manually to compensate the exposure.

2. Maximum Sensitivity

This option is used to set the highest ISO value your camera can set automatically before it starts lowering the shutter speed to get the proper exposure.

3. Minimum shutter speed

This setting allows you to set D90 how slow the shutter speed can be before ISO is boosted up by camera automatically to higher value to get proper exposure. Default value is 1/30th of the second and it's not recommended most of the time to set shutter speed below that unless you are using tripod. If you are using telephoto lens, you might want to set the Minimum shutter speed to 1/250th of the second and if you are using wide angle lens for landscape, you might want to set below 1/30th of the second.