I thought this topic would be helpful to all of you who are interested in DSLR photography but fairly new into the field. I spent days to understand and implement Auto Exposure Lock feature and I feel like it is worth to share with you all so that you don’t have to spend much of your time. Although the idea is same for every DSLR camera, I am taking reference of Nikon D90 for the menu settings and have included couple of photographs I have taken with my D90. If you are using other DSLR, you may have to go through different menu options but you can always refer your camera manual for a quick search.
What is an Auto Exposure?
Camera automatically controls your camera exposure setting under different environmental situation depending upon the lighting condition. For example, if you are shooting any dark subject as a main subject with white background (enormous amount of light), your camera sets the exposure as per background and your main subject will come dark. That's why locking the exposure is very important to properly balance the lighting for your subject blended with different kinds of objects and backgrounds. There was a reader’s question about how to use AE-L/AF-L correctly and I posted a separate blog demonstrating the effect with the snow background. You can follow the link if you are interested to read more about it.
When should I use AE-L function?
The AE-L function can be useful when taking photos in tricky background situation so that the consistent exposure is achieved across the image, or when you wish to expose for the background and then recompose and shoot a photo so that you can achieve a better lighting effect on your subject over different environmental conditions.
How to set AE-L on Nikon D90?
1. Press the Menu button on the left hand side of your camera.
2. Navigate to the Custom Settings Menu (Pencil icon).
3. Go to f Controls menu and option f4 is for AE-L/AF-L button.
4. Select an option according to your need. You can also press the info (i) button to learn more about the particular menu item.
I recommend using AE lock (Hold) because it will lock the exposure and hold that setting until you push the AE-L/AF-L button again.
After the menu is set, you can lock the camera exposure by pressing the AE-L button once. You can find the Exposure Lock button to the right of your viewfinder, which is labeled as AE-L/AF-L. Once you pressed this button, you can see the AE-L icon on the lower left corner of the viewfinder.
Let’s see how does it actually work in our real life example. I will try to explain it with the couple of shots I had taken for this purpose.
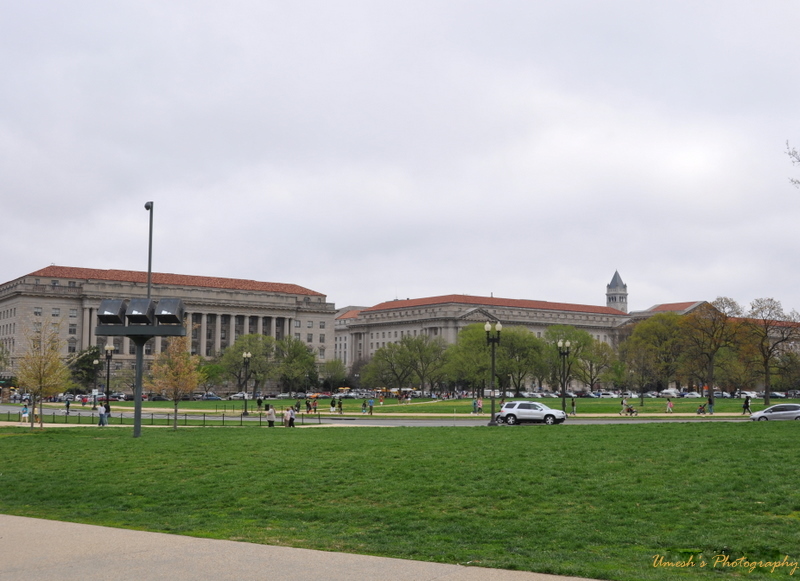
Without Auto Exposure Lock
I took this picture without locking the exposure. Camera controlled the exposure according to the white sky background and my main subject (building) came out bit darker than I would like it to be. Then I took my second picture using the exposure lock feature.
With Auto Exposure Lock
Now what I did in this case is I focused on the walkway (can be seen on the left bottom of the picture) which matches to the building color and locked the exposure (by pressing AE-L/AF-L button) to that settings so that any bright background won’t affect the exposure anymore.
When I took the picture with the exposure being locked at one value (referencing the sidewalk), it overexposed the sky little bit (not too much noticeable in this case) but the subject came out brighter. Sometimes this could create a problem if you are shooting with very bright sky and you have to be careful about the background lighting, how you want to expose your subject and your reference point to lock the exposure for the subject.


